

Tuesday, April 27, 2010
its in the eyes...
Yesterday I had a fun family shoot set up with a lovely mama and her two littles. Just turning two, this little beauty was really fun to capture. She has the most beautiful eyes! We had some fun at my favorite brick wall location near downtown Riverside. On a sad side note, I was told a few weeks ago that the wall was soon to be painted!! OMG! Where will I find another as rad as this one? Sigh. Anyway, one quick image to share.


Round II: ABC Project...
I is for Information... Its everywhere today. I can't seem to get away from it! From internet access on phones, to instant messaging- email, text, phone calls, wi-fi...
This was taken at my trade show this weekend, its my daughter and her BFF, her Motorola Intensity. Now her phone is pretty rad, but it doesn't have Facebook on it. And, for the record, my daughter has informed me that this isn't what Facebook on a phone looks like... she would know. To acheive this- all I did was blur the original text message from the screen (which said, in case you were wondering "so its really not worth it then, is it?"), took a screenshot from her Facebook page, and control + T to transform the image... If you want to keep the image in perspective, hold down alt+shift at the same time, but for this one, I needed it to fit into the screen, so I just held down the control button. With this, you can get your layer right where you need it... So after placing the screenshot just where I thought it looked right, I adjusted the opacity to about 30% and applied an inset bevel effect. Flattened the image, and voila.
Thanks Kayleigh for constantly texting so I could grab this shot.

This was taken at my trade show this weekend, its my daughter and her BFF, her Motorola Intensity. Now her phone is pretty rad, but it doesn't have Facebook on it. And, for the record, my daughter has informed me that this isn't what Facebook on a phone looks like... she would know. To acheive this- all I did was blur the original text message from the screen (which said, in case you were wondering "so its really not worth it then, is it?"), took a screenshot from her Facebook page, and control + T to transform the image... If you want to keep the image in perspective, hold down alt+shift at the same time, but for this one, I needed it to fit into the screen, so I just held down the control button. With this, you can get your layer right where you need it... So after placing the screenshot just where I thought it looked right, I adjusted the opacity to about 30% and applied an inset bevel effect. Flattened the image, and voila.
Thanks Kayleigh for constantly texting so I could grab this shot.

Friday, April 16, 2010
Round II: ABC Project...
G. What's G for? I knew that I wanted to do my son's sly grin. Its just so cute... and well for lack of a better word... grinny!!


Round II: ABC Project...
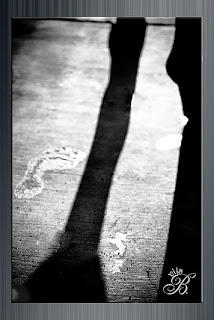
F... F is for lots of things, but this little footprint was actually inspired by my daughter. She is a budding photographer, with her little Nikon point and shoot she gets some really awesome shots. She loves to play with my SLR, but that's mama's toy, and I always get a little more than nervous when she's playing with it. Anyway, she gave me the idea, and showed me a picture of her footprint - but - being an almost 15 year old, she was 'grossed out' by the size of her foot. Silly girl.
Many of you may have met her, as she has accompanied me on many shoots.
Many of you may have met her, as she has accompanied me on many shoots.

Tuesday, April 13, 2010
Round II: ABC Project...
E is for eye... I had trouble with E. Last time I did edge, and wanted something different... So of course I as my Facebook family what their thoughts were, and got a ton of really excellent (haha) suggestions. I decided to pick eye.... One, because I have lots of them around here, and all of them are exquisate. (haha, again).
Eyes really are a window to a soul, at least I think so. And as a photographer, I really love eyes in a photograph. Eyes are something I love to enhance, and although its taken me a little while to get my technique just right, I think I have come a long way since my over-enhancing days.
Do you use photoshop for editing? Here's a quick 5 minute eye enhancing technique to try. I do this on my 'eyes', as well as a few other tweaks.
Open your image, press control + j to create a new layer. With your dodge tool set to about 45% opacity, color over the top layer. Do this for both midtones and highlights. Next, grab the burn tool (I prefer this @ 100% opacity) to enhance just the outside of the color, where it meets the white. I am sure there is a more technical name for this, but... uhm, yea, let's just go with that. There... click off and on the layer you painted on, to see the difference, and adjust your layer to your liking. Flatten your image, and voila, quick & beautiful editing. Have fun!
These are my boys... older J on the left, and younger J on the right. They have amazing eyes!

Eyes really are a window to a soul, at least I think so. And as a photographer, I really love eyes in a photograph. Eyes are something I love to enhance, and although its taken me a little while to get my technique just right, I think I have come a long way since my over-enhancing days.
Do you use photoshop for editing? Here's a quick 5 minute eye enhancing technique to try. I do this on my 'eyes', as well as a few other tweaks.
Open your image, press control + j to create a new layer. With your dodge tool set to about 45% opacity, color over the top layer. Do this for both midtones and highlights. Next, grab the burn tool (I prefer this @ 100% opacity) to enhance just the outside of the color, where it meets the white. I am sure there is a more technical name for this, but... uhm, yea, let's just go with that. There... click off and on the layer you painted on, to see the difference, and adjust your layer to your liking. Flatten your image, and voila, quick & beautiful editing. Have fun!
These are my boys... older J on the left, and younger J on the right. They have amazing eyes!

Subscribe to:
Posts (Atom)